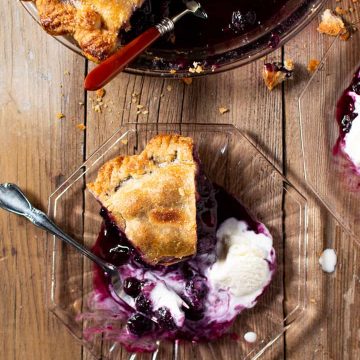
I think blueberry pie is underrated. Maybe it's because of all the thick and gloopy blueberry pie that has been served over the years, usually made with a canned filling. This is a classic recipe, with step by step instructions, that allows the blueberries to shine.
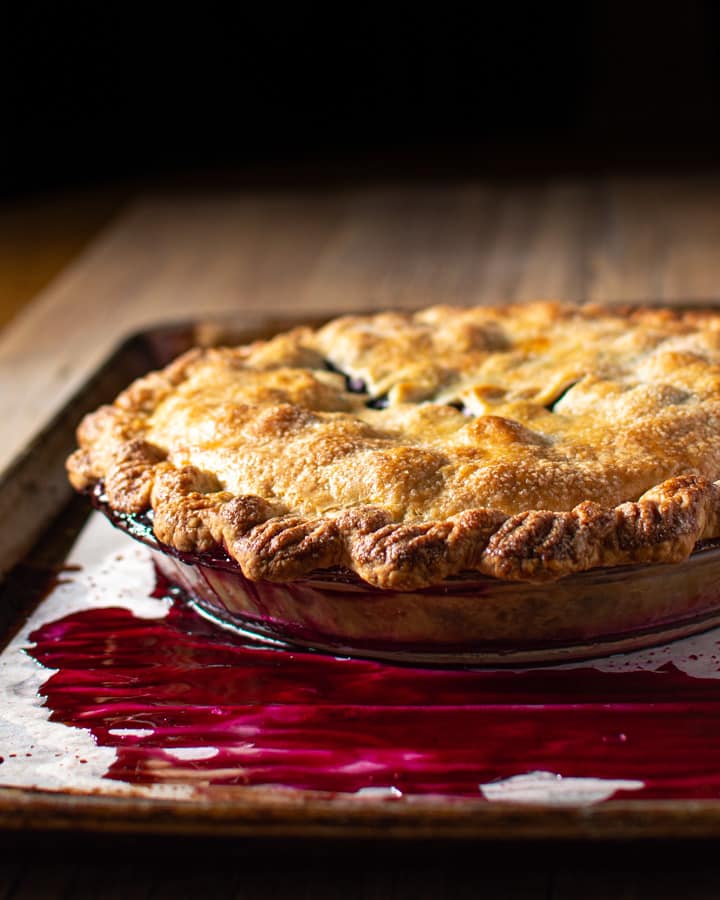
Let your fruit pies just be what they want to be. In other words the fruit should be the star. Especially when it's in season. I have nothing against putting some interesting flavour spins on a fruit pie but when I have a craving I just want that delicious fruit wrapped in a buttery, Flaky Pie Crust. To achieve this you only need a few simple ingredients.
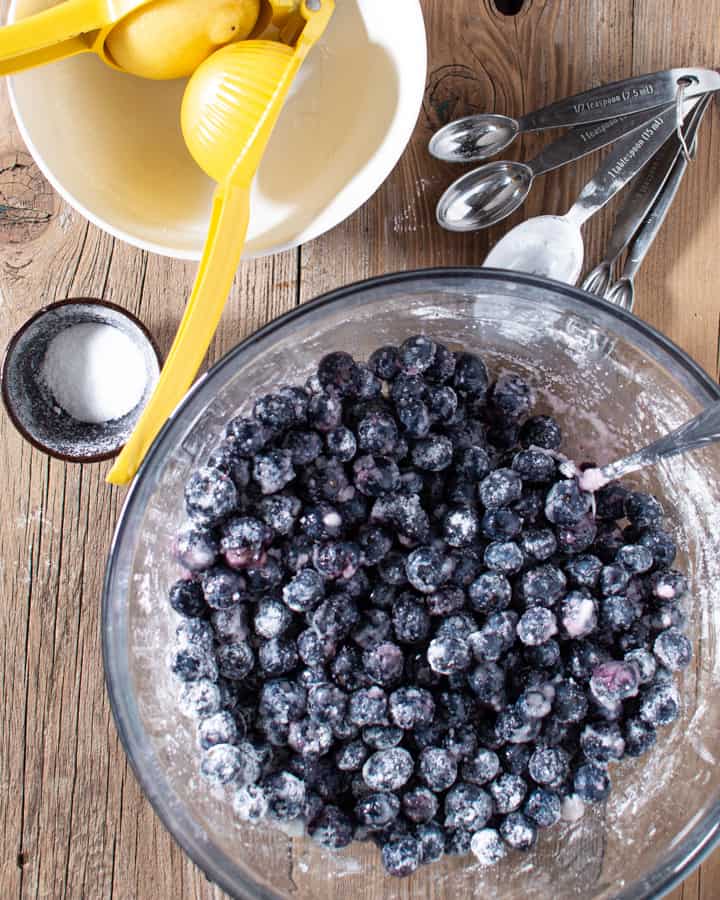
Making the filling is easy. Mix the cornstarch and sugar together first. This ensures that the starch is mixed in evenly without clumping. Toss that with the berries, add some lemon juice and salt and you're all set! If you are planning to make the pie right away just put this aside while you make your pastry. It can also be covered and refrigerated overnight. You can do this with the pie dough as well (see recipe). This is a good option if you want to do some prep work one day and assemble and bake it the next.
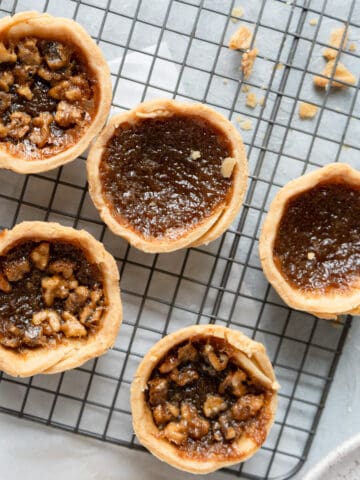
If you love all things pastry you are going to fall in love with these Classic Butter Tarts.
A note about the starch
I like my blueberry pie filling slightly on the runny side. I love when the filling creates a sauce that you can mix with vanilla ice cream, which is a must-have accompaniment to a fruit pie. If you prefer a more set filling you can increase the cornstarch by a tablespoon or two. I use cornstarch in berry pies because the berries release a lot of juice so you need more starch to thicken it. With cornstarch a little goes a long way. Flour is a commonly used starch in pies but you would have to use so much here that your filling would taste floury. We don't want that.
Making the pie shell
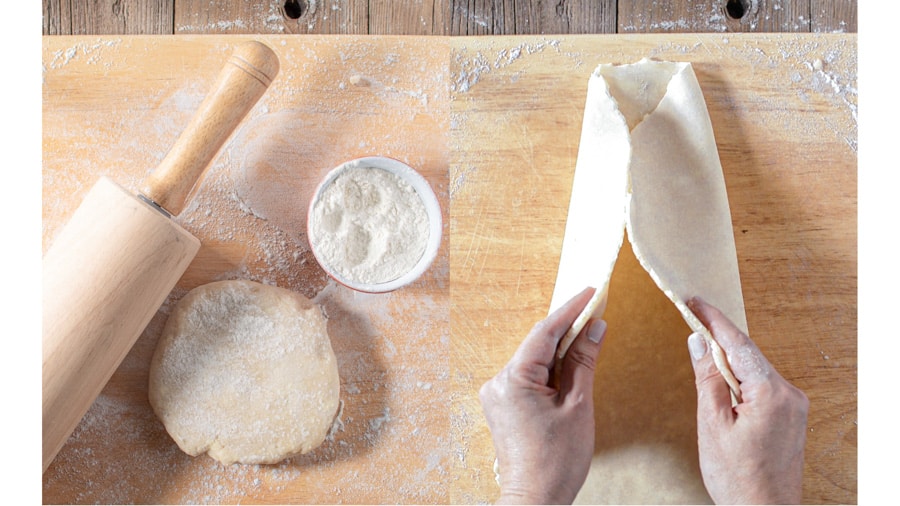
Okay so now you have your filling and your pie dough ready and it's time to start rolling. Capturing the rolling process with photographs is next to impossible (I'm working on figuring out the video thing!). Let me try to explain. You can start rolling the dough straight out of the fridge but if it's too stiff let it sit, covered, for 5-10 mins. Dust the surface and the top of your dough with flour. Roll back and forth, then side to side, then in an "X" trying to keep a circle shape. Keep rolling in those directions, moving the dough around to prevent sticking, Keep rolling until the dough is 2-3 mm thick. If it's sticking don't be afraid to dust with more flour. A very common mistake is to roll the dough too thick. If it's too thick it won't bake through on the bottom or edges and you are left with raw dough. Um...no thanks. Get out a ruler if you have to, until you get a natural feel for it. Trust me, this is important enough to warrant a ruler.
Let's talk rolling pins...
My favourite type of rolling pin for pie dough is one like this 18-Inch Wood Rolling Pin. These are the best all-purpose pins. I also grew up using this style of pin so that might be why I find it easiest to use. A rolling pin is a matter of personal preference. Some prefer the tapered or straight French Rolling Pin. These are also fantastic but I like them for a thicker and/or tougher dough such as firmer yeasted doughs and cookie doughs. If you don't own a rolling pin and only want one I recommend the traditional style with handles. Start with that and if you really get into rolling you can add a French style to your collection.
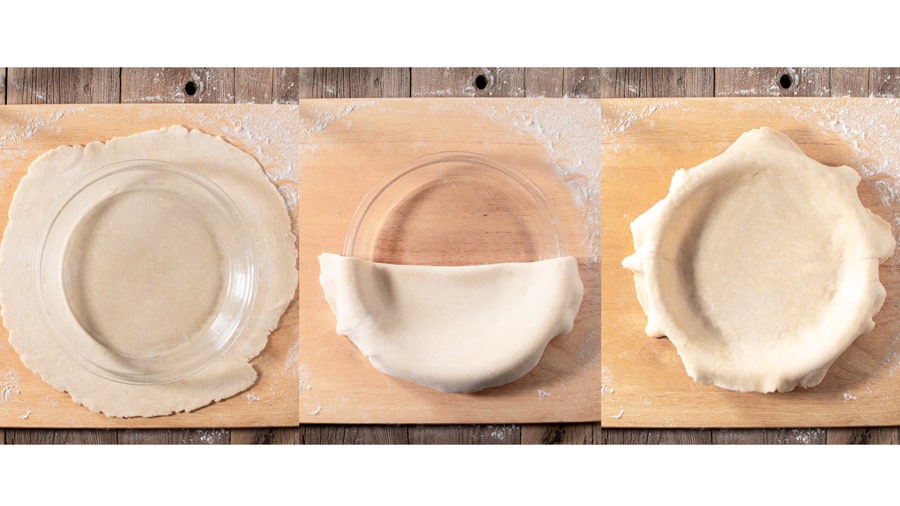
Use your pie plate to measure the size of your circle. It should be large enough to go up the edges and leave an overhang. Press the dough into the bottom of the pie plate so it takes it's shape. A 9" pyrex pie plate is my favourite. I find they do a great job at getting a nice, evenly browned bottom and it has the added bonus of being clear so you can see if your crust is done! They are also very affordable like this one here.
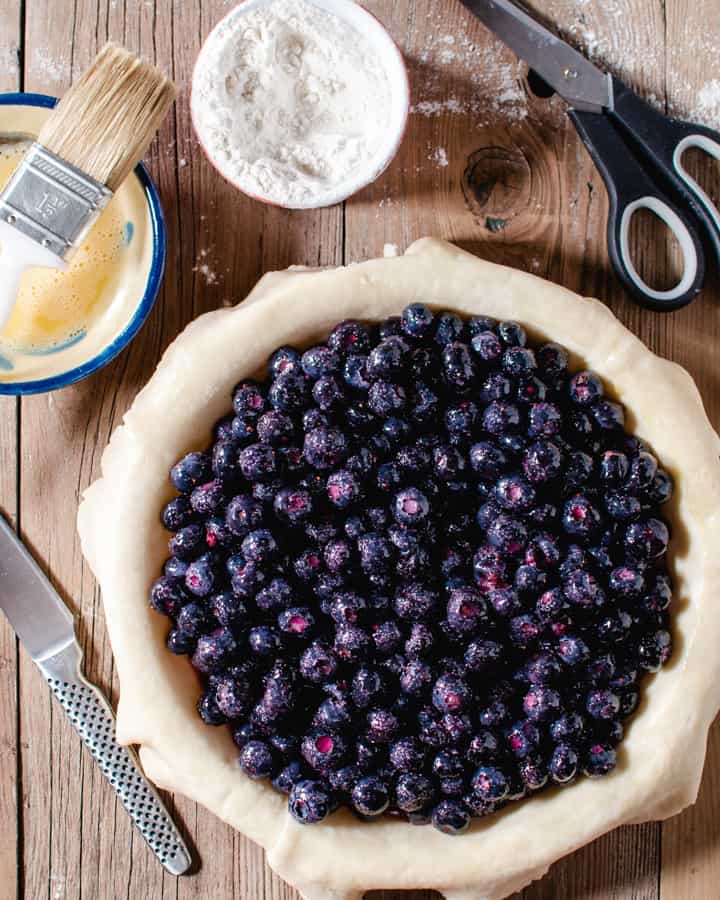
Next egg wash the edges, pour in the filling and roll out the top.
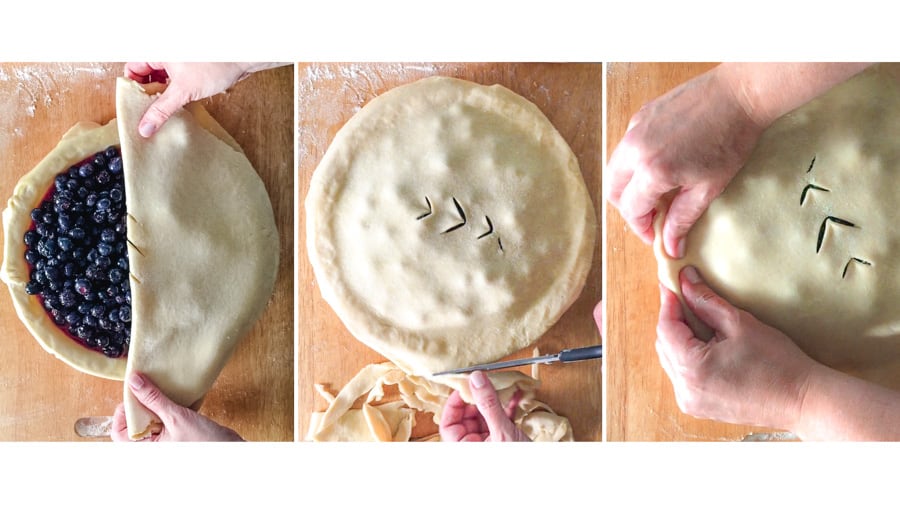
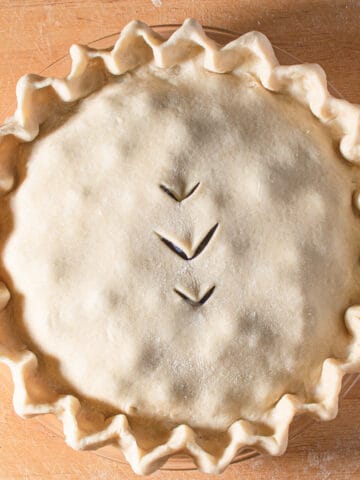
Roll out the pie dough for the top the same way as you did for the bottom but leave the top just slightly thicker. Fold it in half and cut some vent holes by making small slices on a diagonal. You can also use a small cutter if you want to get fancy. Put the top on and trim the edges so there is about 1-2 cm overhang. Pinch together and turn under the edges all the way around so you have an edge to crimp.
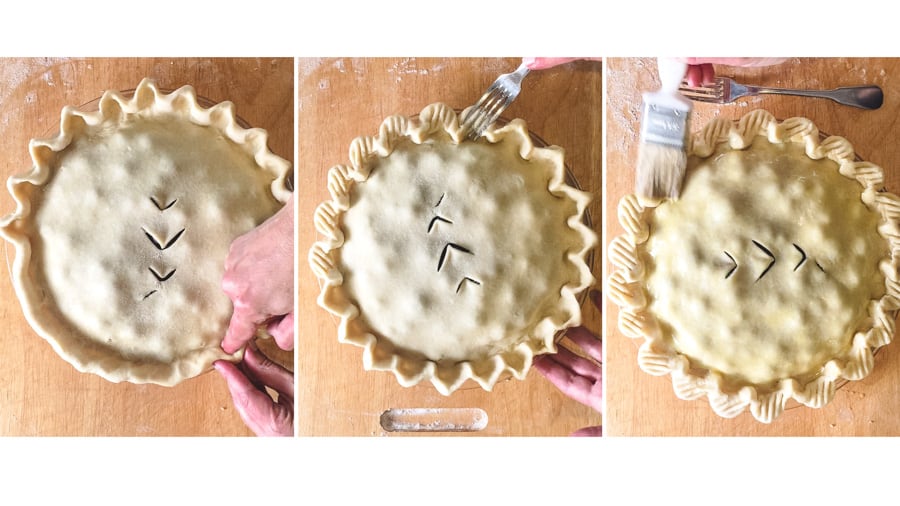
Using your thumb and forefinger of one hand and the forefinger of the other, pinch the edge into "V" shapes all the way around. You can just leave it like this or you can take it one step further and press down the outside points with a floured fork. Then brush with egg wash. There are countless ways to finish a pie edge. A quick google image search can give you lots of beautiful options or even more simple ones. Have a look and see what grabs you! After egg washing I like to sprinkle the top with granulated sugar. This gives a bit of sparkle and extra crunch to the top...and sweetness of course.
The egg wash
There are different types of egg wash for different purposes. I'm not going to get into them all here because that warrants an entire blog post of it's own! For pies I like to keep it simple and use a whole egg which gives a deep golden colour. An important step for a good egg wash is to make sure it is thoroughly mixed. Brush it on evenly and generously but not so much that it starts to pool around the edges.
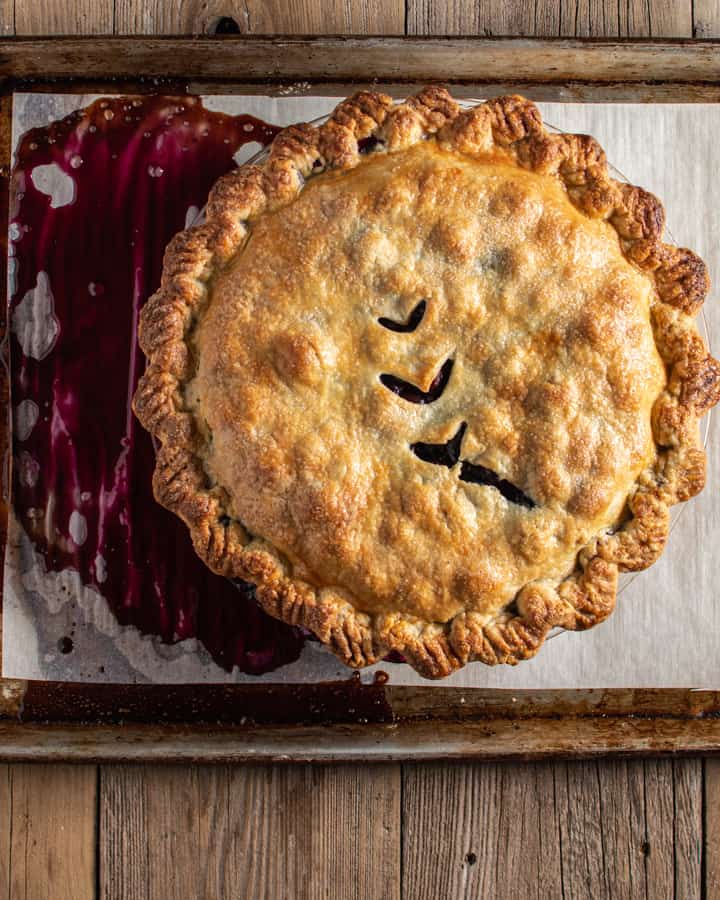
Okay, so... I have to address the crack. Yes my pie crust cracked in a strange way and I did notice it when I put the top on. I contemplated fixing it and then decided that I just want to be real. A rustic pie is just that - rustic. So don't sweat over imperfections. It still looks beautiful and appetizing right?
Baking
Baking a pie properly is one of the trickiest parts, believe it or not. In fact this is where many people fail even if they have done everything else perfectly. Talk about disappointing! The secret is to "over-bake" it, in a way. I like to push it just over the edge of when I think it's done. Trust me when I say "A double crust fruit pie will not be done in less than one hour!" Now someone might want to argue this point but I have baked literally thousands of fruit pies and this has always been my experience. If the edges are browning too much for your liking you can wrap them in foil or turn down the oven temperature. Either way works just fine.
Another myth is to serve the pie straight out of the oven. Don't do this! You need to let a fruit pie set after baking otherwise the filling is just going to pour out everywhere. Let it rest at room temperature for at least one hour but preferably overnight. This allows the juices to set and the flavours to meld. If you want to serve warm pie just pop it back in a 350°F oven for 20 minutes or so. Test warmness by inserting a knife, leave it for a few seconds, and then feel if it's warm enough.
Who cares about that crack now right?!
Pro tips for best results
- Prepare the filling at least 30 minutes before assembly and up to 24 hours.
- Adjust the amount of cornstarch to reach the thickness you like
- Roll the bottom crust to an even thickness of about 2 mm
- Try to keep the dough in a circle shape by moving it and your rolling pin around as you roll.
- Use a whole egg egg wash for a nice golden brown and shiny top
- Sprinkle top with granulated sugar for extra sweetness, crunch and sparkle
- Bake at a moderately high temperature to ensure doneness on the bottom and lower the temp half way through baking if edges are browning too much
- Bake a little bit longer than you think you need to make sure that bottom crust is baked through.
- Always bake on the center rack.
- Let the pie sit for at least one hour after baking but preferably overnight to allow the juices to set and the flavours to meld.
- Re-warm before serving if you like.
More Dessert Recipes
📖 Recipe
Blueberry Pie
Ingredients
- 1 recipe Flaky Pie Crust, make first
- 6 cups blueberries, fresh
- 1 cup granulated sugar
- ¼ cup cornstarch
- ½ teaspoon kosher salt
- 1 lemon, juice of
- 1 egg, for egg wash
Instructions
For the filling
- Wash and dry blueberries. Place in a bowl large enough so there is room to stir.
- In a separate bowl, mix together sugar and cornstarch. Add to blueberries. Add salt and lemon juice and stir until incorporated
- Let sit at room temperature for 30 minutes or in the fridge for up to 24 hours.
Assembly
- Preheat oven to 375°F. Place rack in center of oven.
- Roll out the bottom pie crust a circle that is about 5-8 cm (2-3") bigger than the pie plate and approx. 2-3 mm thickness. Place in pie plate and press to form.
- To make the egg wash mix the egg together thoroughly. brush the edges of your pie crust with egg wash and pour in the blueberry filling.
- Roll out the top slightly bigger than the pie plate. Fold in half and cut vent holes by making 3 slits on an angle. Place the folded edge in the center of the pie and unfold. Press the edges together.
- Trim edges with scissors so there is about 1.5 cm (½") overhang. Fold edge under to create a lip.
- Using the thumb and forefinger of one hand and the forefinger of the other pinch "V" shapes around the edge. With a floured fork press down the outside "V"s to make a decorative pattern (optional). See photos above.
- Egg wash the entire top and edges of the pie and sprinkle with granulated sugar.
- Place the pie on a parchment lined tray to catch the drips
- Place in preheated oven and bake for one hour checking after 40 minutes to see if edges are browning too much. If they are, lower oven temperature to 350°F and/or cover edges with foil.
- After one hour check to see if the filling has nicely bubbled out and the crust is very golden brown. If you think it could bake for another 5-10 minutes without getting too dark, do it.
- When done remove from oven and let stand for a minimum of one hour but preferably overnight.
Notes
- To serve pie warm; preheat oven to 350°F and bake for 20-30 minutes. Check warmth by inserting a paring knife, leave it in for a few seconds, then check the temperature.
- Pie can be frozen before baking. Let freeze unwrapped and wrap when frozen. Bake from frozen in a preheated 350°F oven for the same amount of time.
- Pie can be frozen after baking. Let cool completely, wrap and freeze. Defrost unwrapped at room temperature and reheat it in a 350°F oven for 30 minutes.




Marylynn says
Will be making this blueberry pie for Easter, luv that it can be made a day in advance. Do you have a great apple pie recipe? Thanks
Andrea says
I haven't written down a recipe for apple filling but I think it's on the list for Fall this year ☺️
Ann says
Good morning ,
My sister is a Livy loser and has lost 30 pounds!
I want to surprise her with a raspberry pie ( her fav) for her birthday.
Do I treat the raspberries the same way as the blueberries?
Thank you
Andrea says
Hi Ann!
What a lovely gift! Yes you can substitute the raspberries for blueberries. Hope she enjoys it!
Jenny T. says
Thank you Andrea! I have been looking for the ultimate butter pastry recipe 🙂 I look forward to using it more often.
Andrea says
You are very welcome! Enjoy!
Aunt Ruby says
I have never had luck with making a double crust pie pastry .Have always used the pound of lard recipe. I tried your double crust method, and wow it was wonderful.
Thanks Andrea,
Andrea says
This is very high praise as I know what an experienced baker you are Ruby! I'm so pleased and flattered that you had success with my recipe! Thanks for the feedback. I really appreciate it!